3d-printed wall panel
optimizing a wall panel for maximum visual interest and printability
FORMAL OPTIMIZATION
This 3D-printed wall panel had two conflicting goals. First, the design needed to maximize visual interest, and second, the panel needed to be printable. Visual interest was defined as curve deviation, meaning that the more free-form curvature was present, the more dramatic the panel would appear, and thus, the more visually interesting it would be.

Printability was defined by cantilever angle, or the amount each successive layer is offset from the previous one. This assured there would be enough overlap between layers, allowing for proper layer bonding and structural integrity. Shown below is a cantilever angle analysis for a possible panel. Black areas indicate places where the cantilever angle is too high, meaning the print will fail.

Once the constraints were known, the panel could be optimized to ensure visual interest while remaining printable. The process used an evolutionary solver that tested tens-of-thousands of panels in order to discover top-performing options.
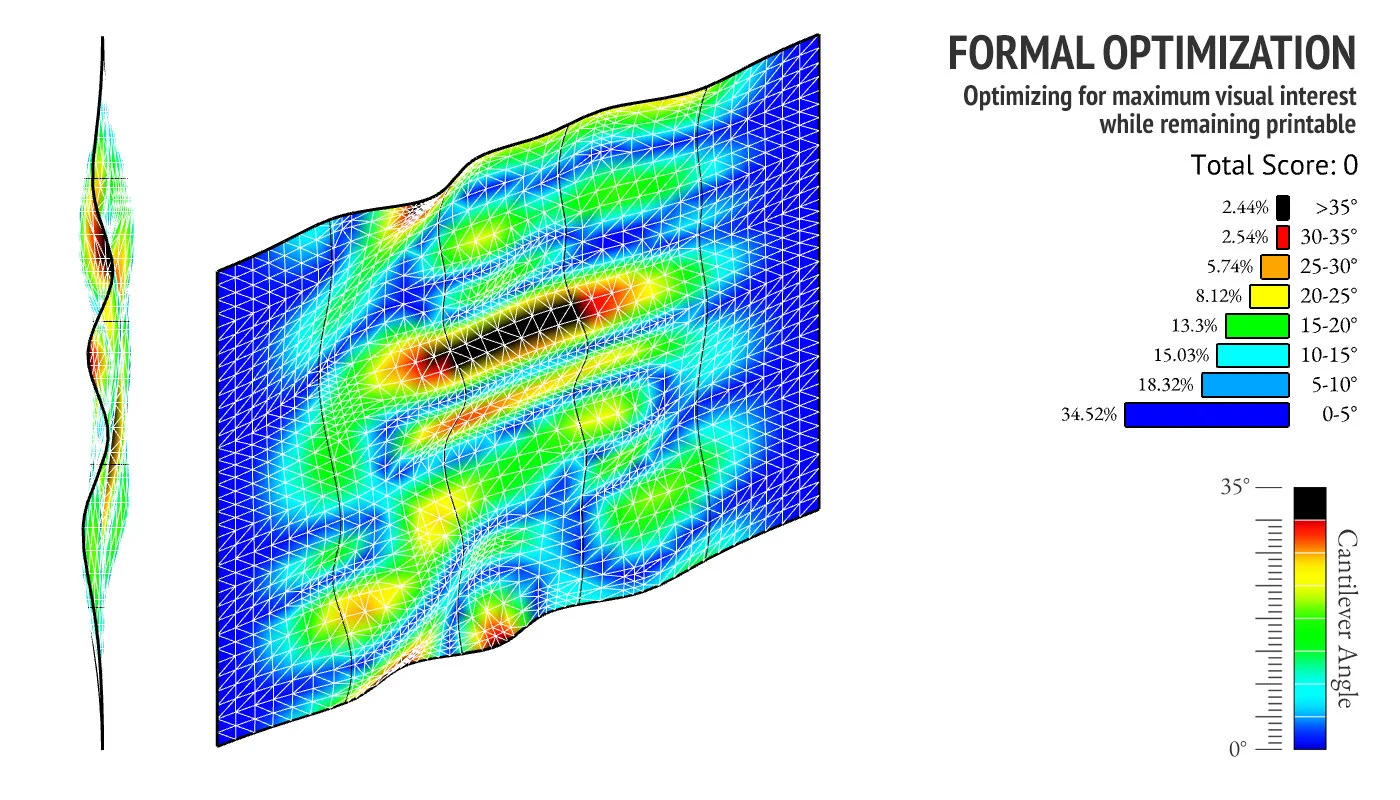
Top-performing options were then reviewed in order to choose which panel to print.

Robot Tool pathing
Once the optimized panel is defined, the robot tool paths can be defined. This is a multi-step process that involves slicing the surface, dividing the slices, and orienting planes for the robot to follow.

Printed Object
The printed wall panel follows the contours of the original surface, with a striated pattern reflective of the printing process. Through simulation and optimization, the design team can be sure the panel has maximum visual interest while remaining printable.


